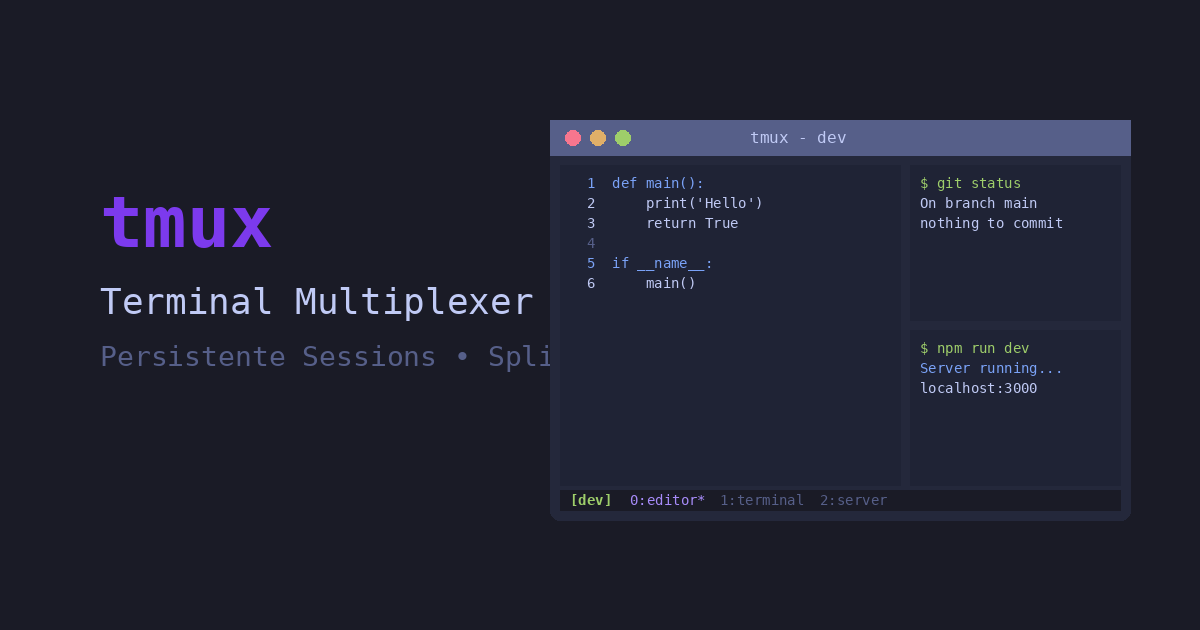
tmux ist ein Terminal-Multiplexer, der deine Produktivität im Terminal drastisch steigern kann. Er ermöglicht mehrere Terminal-Sessions in einem Fenster, persistente Sessions die SSH-Verbindungsabbrüche überleben, und flexible Layouts für komplexe Workflows.
 Eine typische tmux-Session mit mehreren Panes
Was ist tmux?
tmux (Terminal Multiplexer) ist ein Programm, das mehrere virtuelle Terminals in einem einzigen Terminal-Fenster verwaltet. Es wurde als Nachfolger von GNU Screen entwickelt und ist heute der De-facto-Standard für Terminal-Multiplexing.
%%{init: {'theme': 'dark'}}%%
flowchart TD
    subgraph Terminal["Dein Terminal-Fenster"]
        A[tmux Server]
    end

    A --> B[Session 1: dev]
    A --> C[Session 2: server]
    A --> D[Session 3: logs]

    B --> E[Window 1: Editor]
    B --> F[Window 2: Tests]

    E --> G[Pane: nvim]
    E --> H[Pane: Terminal]

    style Terminal fill:#1e3a5f,stroke:#60a5fa
    style A fill:#7c3aed,stroke:#a78bfa,color:#fff
Kernkonzepte
| Begriff |
Beschreibung |
Analogie |
| Server |
Der tmux-Daemon im Hintergrund |
Das Betriebssystem |
| Session |
Eine Sammlung von Windows |
Ein Projekt/Workspace |
| Window |
Ein einzelnes Terminal (Tab) |
Ein Browser-Tab |
| Pane |
Ein Teil eines Windows (Split) |
Ein geteiltes Fenster |
Warum tmux?
- Persistenz: Sessions überleben Verbindungsabbrüche und Terminal-Schließungen
- Multiplexing: Mehrere Terminals in einem Fenster
- Remote-Arbeit: Perfekt für SSH-Sessions auf Servern
- Scripting: Automatisierbare Layouts und Workflows
- Pair Programming: Sessions können geteilt werden
tmux ist besonders wertvoll bei der Arbeit auf Remote-Servern. Wenn die SSH-Verbindung abbricht, läuft die Session weiter!
Installation
Debian/Ubuntu
1
2
| sudo apt update
sudo apt install tmux
|
Fedora
macOS
Version prüfen
1
2
| tmux -V
# Ausgabe: tmux 3.4
|
Der Prefix-Key
tmux verwendet einen Prefix-Key, der vor jedem Befehl gedrückt werden muss. Der Standard ist Ctrl + b, aber wir verwenden Ctrl + a (wie GNU Screen) - das liegt näher und ist ergonomischer.
%%{init: {'theme': 'dark'}}%%
flowchart LR
    A["<kbd>Ctrl</kbd> + <kbd>a</kbd>"] --> B["Warten"]
    B --> C["Befehlstaste"]
    C --> D["Aktion"]

    style A fill:#7c3aed,stroke:#a78bfa,color:#fff
    style C fill:#059669,stroke:#34d399,color:#fff
Beispiel: Um ein neues Fenster zu erstellen:
- Drücke Ctrl + a
- Lasse los
- Drücke c
Im weiteren Verlauf wird der Prefix als Prefix abgekürzt. Das bedeutet: Ctrl + a (unsere Konfiguration).
Erste Schritte
Session starten
1
2
3
4
5
6
7
8
9
10
| # Neue unbenannte Session
tmux
# Neue benannte Session (empfohlen!)
tmux new -s projektname
# Beispiele
tmux new -s dev
tmux new -s homelab
tmux new -s logs
|
Session verlassen (Detach)
Prefix, dann d
Die Session läuft im Hintergrund weiter!
Laufende Sessions anzeigen
1
2
3
4
| tmux ls
# Ausgabe:
# dev: 2 windows (created Mon Jan 5 10:00:00 2026)
# homelab: 1 windows (created Mon Jan 5 09:30:00 2026)
|
Session wieder verbinden (Attach)
1
2
3
4
5
6
7
8
9
| # Letzte Session
tmux attach
# oder kurz
tmux a
# Bestimmte Session
tmux attach -t dev
# oder kurz
tmux a -t dev
|
Session beenden
1
2
3
4
5
6
7
| # Von außen
tmux kill-session -t sessionname
# Von innen
exit # im letzten Pane/Window
# oder
Prefix + : → kill-session
|
Windows (Fenster)
Windows sind wie Tabs in einem Browser. Jede Session kann mehrere Windows haben.
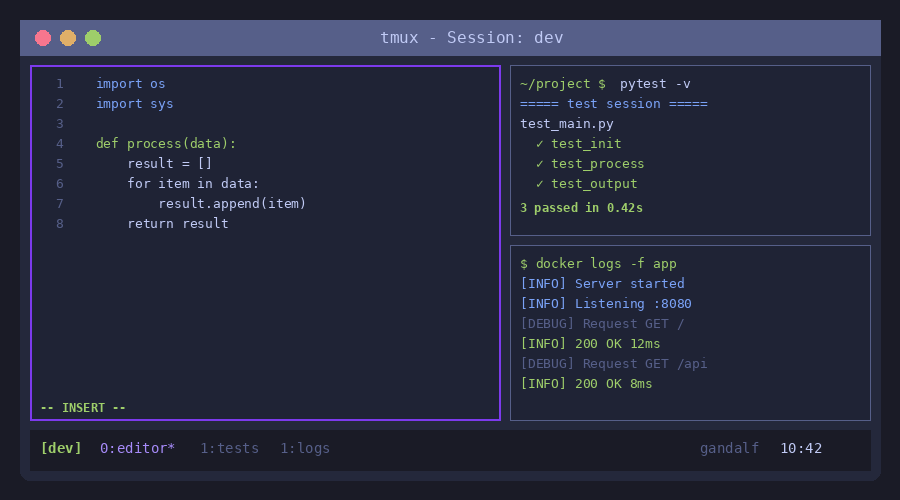
 Die Statusleiste zeigt alle Windows der aktuellen Session
Window-Befehle
| Tastenkombination |
Aktion |
| Prefix, c |
Neues Window erstellen |
| Prefix, n |
Nächstes Window |
| Prefix, p |
Vorheriges Window |
| Prefix, 0-9 |
Zu Window 0-9 wechseln |
| Prefix, w |
Window-Liste anzeigen |
| Prefix, , |
Window umbenennen |
| Prefix, & |
Window schließen (mit Bestätigung) |
| Prefix, l |
Zum letzten Window wechseln |
Window-Workflow
%%{init: {'theme': 'dark'}}%%
flowchart LR
    subgraph Session["Session: dev"]
        A["0: editor ★"] --> B["1: tests"]
        B --> C["2: server"]
        C --> D["3: logs"]
    end

    style A fill:#059669,stroke:#34d399,color:#fff
Benenne deine Windows sinnvoll mit Prefix, , - das spart Zeit beim Navigieren!
Panes (Splits)
Panes teilen ein Window in mehrere Bereiche. Damit kannst du mehrere Terminals gleichzeitig sehen.
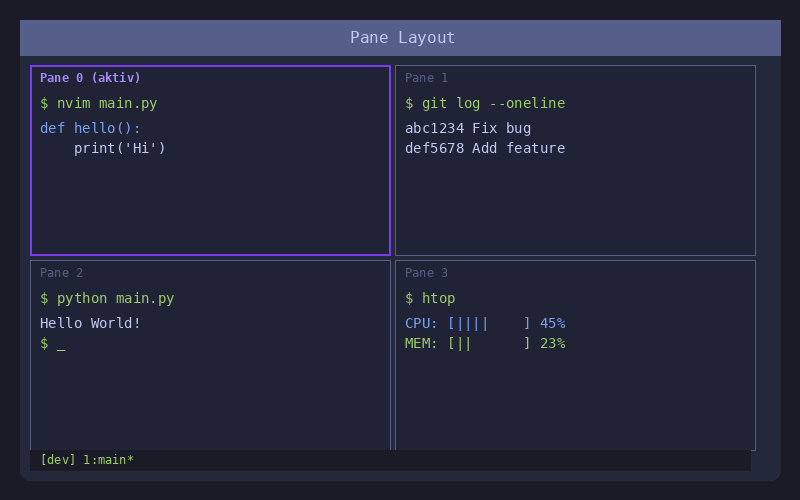 Ein Window mit vier Panes in unterschiedlichen Größen
Pane-Befehle
| Tastenkombination |
Aktion |
| Prefix, % |
Vertikaler Split (links/rechts) |
| Prefix, " |
Horizontaler Split (oben/unten) |
| Prefix, Pfeiltaste |
Zu anderem Pane wechseln |
| Prefix, o |
Zum nächsten Pane wechseln |
| Prefix, ; |
Zum letzten aktiven Pane |
| Prefix, x |
Aktuelles Pane schließen |
| Prefix, z |
Pane maximieren/wiederherstellen (Zoom) |
| Prefix, ! |
Pane in eigenes Window verschieben |
| Prefix, q |
Pane-Nummern anzeigen |
| Prefix, q, 0-9 |
Zu Pane mit Nummer wechseln |
Pane-Größe ändern
| Tastenkombination |
Aktion |
| Prefix, Ctrl + Pfeiltaste |
Größe in 1-Zeichen-Schritten ändern |
| Prefix, Alt + Pfeiltaste |
Größe in 5-Zeichen-Schritten ändern |
| Prefix, Space |
Zwischen Layouts wechseln |
Vordefinierte Layouts
Prefix, Space wechselt zwischen:
1
2
3
4
5
6
7
8
9
10
11
12
13
| ┌─────────────────┐ ┌────────┬────────┐ ┌─────────────────┐
│ │ │ │ │ │ 1 │
│ 1 │ │ 1 │ 2 │ ├────────┬────────┤
│ │ │ │ │ │ 2 │ 3 │
└─────────────────┘ └────────┴────────┘ └────────┴────────┘
even-horizontal even-vertical main-horizontal
┌────────┬────────┐ ┌─────┬─────┬─────┐
│ │ 2 │ │ │ │ │
│ 1 ├────────┤ │ 1 │ 2 │ 3 │
│ │ 3 │ │ │ │ │
└────────┴────────┘ └─────┴─────┴─────┘
main-vertical tiled
|
Im Copy Mode kannst du durch die Terminal-Ausgabe scrollen und Text kopieren.
Copy Mode aktivieren
| Tastenkombination |
Aktion |
| Prefix, [ |
Copy Mode starten |
| q oder Esc |
Copy Mode verlassen |
Navigation im Copy Mode
| Tastenkombination |
Aktion |
| ↑ ↓ ← → |
Cursor bewegen |
| Page Up / Page Down |
Seitenweise scrollen |
| g |
Zum Anfang |
| G |
Zum Ende |
| / |
Vorwärts suchen |
| ? |
Rückwärts suchen |
| n |
Nächster Suchtreffer |
| N |
Vorheriger Suchtreffer |
Text kopieren (vi-Mode)
| Tastenkombination |
Aktion |
| Space |
Markierung starten |
| Enter |
Markierten Text kopieren |
| Prefix, ] |
Text einfügen |
Aktiviere vi-Mode in der Konfiguration für vim-ähnliche Keybindings im Copy Mode!
Session-Management
Zwischen Sessions wechseln
| Tastenkombination |
Aktion |
| Prefix, s |
Session-Liste anzeigen |
| Prefix, ( |
Vorherige Session |
| Prefix, ) |
Nächste Session |
| Prefix, $ |
Session umbenennen |
Session-Übersicht
Prefix, s zeigt eine interaktive Liste:
1
2
3
| (0) + dev: 3 windows
(1) + homelab: 2 windows (attached)
(2) + logs: 1 windows
|
Mit den Pfeiltasten navigieren, Enter zum Wechseln.
Konfiguration (~/.tmux.conf)
tmux wird über ~/.tmux.conf konfiguriert. Änderungen werden nach Neustart oder mit Prefix, : → source-file ~/.tmux.conf aktiv.
Empfohlene Basis-Konfiguration
1
2
3
4
5
6
7
8
9
10
11
12
13
14
15
16
17
18
19
20
21
22
23
24
25
26
27
28
29
30
31
32
33
34
35
36
37
38
39
40
41
42
43
44
45
46
47
48
49
50
51
52
53
54
55
56
57
58
59
60
61
62
63
64
65
66
| # ~/.tmux.conf - Optimierte Konfiguration
# Prefix ändern auf Ctrl+a (wie Screen)
unbind C-b
set -g prefix C-a
bind C-a send-prefix
# Bessere Splits mit | und -
bind | split-window -h -c "#{pane_current_path}"
bind - split-window -v -c "#{pane_current_path}"
# Schnelles Config-Reload
bind r source-file ~/.tmux.conf \; display "Config reloaded!"
# Maus-Unterstützung aktivieren
set -g mouse on
# Nummerierung bei 0 starten (Standard)
set -g base-index 0
setw -g pane-base-index 0
# Fenster automatisch neu nummerieren
set -g renumber-windows on
# History vergrößern
set -g history-limit 50000
# Vi-Mode für Copy Mode
setw -g mode-keys vi
# Schnellere Escape-Erkennung
set -sg escape-time 0
# 256-Farben Terminal
set -g default-terminal "tmux-256color"
set -ga terminal-overrides ",*256col*:Tc"
# Statusleiste anpassen (unten, mit Session-Name)
set -g status-position bottom
set -g status-style "bg=#1a1b26 fg=#c0caf5"
set -g status-left-length 50
set -g status-left "#[fg=#7aa2f7,bold][#S] "
set -g status-right "#[fg=#565f89]%H:%M %d-%b-%y"
# Window-Status Format (inaktive gedimmt, aktives hervorgehoben)
setw -g window-status-format "#[fg=#565f89]#I:#W"
setw -g window-status-current-format "#[fg=#7c3aed,bold]#I:#W*"
setw -g window-status-separator " "
# Pane-Navigation mit vim-Tasten
bind h select-pane -L
bind j select-pane -D
bind k select-pane -U
bind l select-pane -R
# Pane-Größe mit vim-Tasten + Shift
bind -r H resize-pane -L 5
bind -r J resize-pane -D 5
bind -r K resize-pane -U 5
bind -r L resize-pane -R 5
# Clipboard-Integration (Linux)
bind -T copy-mode-vi y send-keys -X copy-pipe-and-cancel "xclip -in -selection clipboard"
# Pane-Synchronisation toggle
bind S setw synchronize-panes
|
Wichtige Konfigurationsoptionen erklärt
| Option |
Beschreibung |
set -g prefix |
Ändert den Prefix-Key |
set -g mouse on |
Aktiviert Maus-Unterstützung |
set -g base-index 0 |
Windows starten bei 0 (Standard) |
setw -g mode-keys vi |
Vi-Keybindings im Copy Mode |
set -g history-limit |
Scrollback-Buffer Größe |
set -sg escape-time 0 |
Eliminiert Verzögerung nach Escape |
Praktische Workflows
Workflow 1: Entwicklungsumgebung
1
2
3
4
5
6
7
8
9
10
11
12
13
14
15
16
17
18
19
20
21
22
| # Session erstellen
tmux new -s dev
# Layout aufbauen:
# - Window 1: Editor (nvim)
# - Window 2: Terminal für Git/Tests
# - Window 3: Server/Logs
# Im ersten Window: Editor öffnen
nvim .
# Neues Window für Terminal
Prefix + c
# Window benennen
Prefix + , → "terminal"
# Neues Window für Server
Prefix + c
# Window benennen
Prefix + , → "server"
# Split für Logs
Prefix + "
|
Workflow 2: Server-Monitoring
1
2
3
4
5
6
7
8
9
10
| tmux new -s monitoring
# Splits erstellen
Prefix + % # Vertikal
Prefix + " # Horizontal im rechten Pane
# In jedem Pane anderen Befehl:
# Pane 1: htop
# Pane 2: tail -f /var/log/syslog
# Pane 3: watch -n1 'docker ps'
|
 Server-Monitoring mit drei Panes
Workflow 3: Multi-Server Management
1
2
3
4
5
6
7
8
9
10
11
12
13
14
15
16
17
| # Session mit Synchronisation
tmux new -s servers
# Mehrere Panes erstellen
Prefix + %
Prefix + %
Prefix + "
Prefix + "
# In jedem Pane zu anderem Server verbinden
# Pane 1: ssh server1
# Pane 2: ssh server2
# etc.
# Synchronisation aktivieren
Prefix + S
# Jetzt wird jede Eingabe an ALLE Panes gesendet!
|
Pane-Synchronisation ist perfekt für Updates auf mehreren Servern gleichzeitig!
tmux und Neovim/LazyVim
tmux und Neovim ergänzen sich perfekt:
Empfohlene Integration
1
2
3
4
5
6
7
8
9
10
| # In ~/.tmux.conf
# Smart pane switching mit vim-Unterstützung
is_vim="ps -o state= -o comm= -t '#{pane_tty}' \
| grep -iqE '^[^TXZ ]+ +(\\S+\\/)?g?(view|l?n?vim?x?)(diff)?$'"
bind -n 'C-h' if-shell "$is_vim" 'send-keys C-h' 'select-pane -L'
bind -n 'C-j' if-shell "$is_vim" 'send-keys C-j' 'select-pane -D'
bind -n 'C-k' if-shell "$is_vim" 'send-keys C-k' 'select-pane -U'
bind -n 'C-l' if-shell "$is_vim" 'send-keys C-l' 'select-pane -R'
|
Damit kannst du mit Ctrl + h/j/k/l nahtlos zwischen vim-Splits UND tmux-Panes wechseln!
Typisches Entwickler-Setup
1
2
3
4
5
6
7
8
9
10
11
| ┌─────────────────────────────────────────────────────────┐
│ tmux Session │
├─────────────────────────────────┬───────────────────────┤
│ │ │
│ │ Terminal (Tests) │
│ Neovim/LazyVim │ │
│ ├───────────────────────┤
│ │ │
│ │ Terminal (Git) │
│ │ │
└─────────────────────────────────┴───────────────────────┘
|
Plugins mit TPM
TPM (Tmux Plugin Manager) ermöglicht die Installation von Plugins.
TPM installieren
1
| git clone https://github.com/tmux-plugins/tpm ~/.tmux/plugins/tpm
|
Plugins konfigurieren
1
2
3
4
5
6
7
8
9
10
11
12
13
14
15
16
17
18
19
| # Am Ende von ~/.tmux.conf
# Plugin-Liste
set -g @plugin 'tmux-plugins/tpm'
set -g @plugin 'tmux-plugins/tmux-sensible'
set -g @plugin 'tmux-plugins/tmux-resurrect'
set -g @plugin 'tmux-plugins/tmux-continuum'
set -g @plugin 'catppuccin/tmux'
# Resurrect-Einstellungen
set -g @resurrect-capture-pane-contents 'on'
set -g @resurrect-strategy-nvim 'session'
# Continuum - Auto-Save alle 15 Min
set -g @continuum-restore 'on'
set -g @continuum-save-interval '15'
# TPM initialisieren (muss am Ende stehen!)
run '~/.tmux/plugins/tpm/tpm'
|
Plugins installieren
- Füge Plugin zu
~/.tmux.conf hinzu
- Drücke Prefix, I (großes I) zum Installieren
- Prefix, U zum Updaten
Empfohlene Plugins
| Plugin |
Beschreibung |
| tmux-sensible |
Vernünftige Standard-Einstellungen |
| tmux-resurrect |
Sessions speichern und wiederherstellen |
| tmux-continuum |
Automatisches Speichern |
| tmux-yank |
Bessere Clipboard-Integration |
| catppuccin/tmux |
Modernes Theme |
Troubleshooting
Problem: Farben werden nicht korrekt angezeigt
1
2
3
4
5
6
| # In ~/.tmux.conf
set -g default-terminal "tmux-256color"
set -ga terminal-overrides ",xterm-256color:Tc"
# Terminal-Variable prüfen
echo $TERM
|
Problem: Escape-Taste hat Verzögerung in Neovim
1
2
| # In ~/.tmux.conf
set -sg escape-time 0
|
Problem: Copy/Paste funktioniert nicht
1
2
3
4
5
6
7
8
| # Für Linux (X11)
sudo apt install xclip
# In ~/.tmux.conf
bind -T copy-mode-vi y send-keys -X copy-pipe-and-cancel "xclip -in -selection clipboard"
# Für Wayland
sudo apt install wl-clipboard
bind -T copy-mode-vi y send-keys -X copy-pipe-and-cancel "wl-copy"
|
Problem: Session nach Reboot verloren
Nutze das tmux-resurrect Plugin (siehe oben) oder erstelle ein Startup-Script:
1
2
3
4
5
6
7
8
9
| #!/bin/bash
# ~/bin/tmux-start.sh
tmux has-session -t dev 2>/dev/null
if [ $? != 0 ]; then
tmux new-session -d -s dev
tmux send-keys -t dev 'cd ~/projects && nvim' Enter
fi
tmux attach -t dev
|
Cheat Sheet
Sessions
| Befehl/Taste |
Aktion |
tmux new -s name |
Neue Session |
tmux a -t name |
Session verbinden |
tmux ls |
Sessions auflisten |
tmux kill-session -t name |
Session beenden |
| Prefix, d |
Detach |
| Prefix, s |
Session-Liste |
| Prefix, $ |
Session umbenennen |
Windows
| Taste |
Aktion |
| Prefix, c |
Neues Window |
| Prefix, n / p |
Nächstes/Vorheriges |
| Prefix, 0-9 |
Zu Window wechseln |
| Prefix, w |
Window-Liste |
| Prefix, , |
Umbenennen |
| Prefix, & |
Schließen |
Panes
| Taste |
Aktion |
| Prefix, % |
Vertikaler Split |
| Prefix, " |
Horizontaler Split |
| Prefix, Pfeiltaste |
Pane wechseln |
| Prefix, x |
Pane schließen |
| Prefix, z |
Zoom toggle |
| Prefix, Space |
Layout wechseln |
| Prefix, ! |
Pane → Window |
Copy Mode
| Taste |
Aktion |
| Prefix, [ |
Copy Mode starten |
| Space |
Markierung starten |
| Enter |
Kopieren |
| Prefix, ] |
Einfügen |
| q |
Copy Mode beenden |
Fazit
tmux ist ein unverzichtbares Tool für jeden, der viel im Terminal arbeitet:
| Pro |
Contra |
| Persistente Sessions |
Lernkurve für Keybindings |
| Flexibles Multiplexing |
Konfiguration erforderlich |
| Perfekt für Remote-Arbeit |
Prefix-Key kann ungewohnt sein |
| Scripting-fähig |
Ohne Maus weniger intuitiv |
| Ressourcenschonend |
|
Meine Empfehlung: Beginne mit den Basics (Sessions, Windows, grundlegende Panes), nutze die empfohlene Konfiguration, und erweitere schrittweise. Nach einer Woche wirst du dich fragen, wie du jemals ohne tmux gearbeitet hast!
Ressourcen