VM-Setup in 5 Minuten: Dotfiles für schnelle Einrichtung
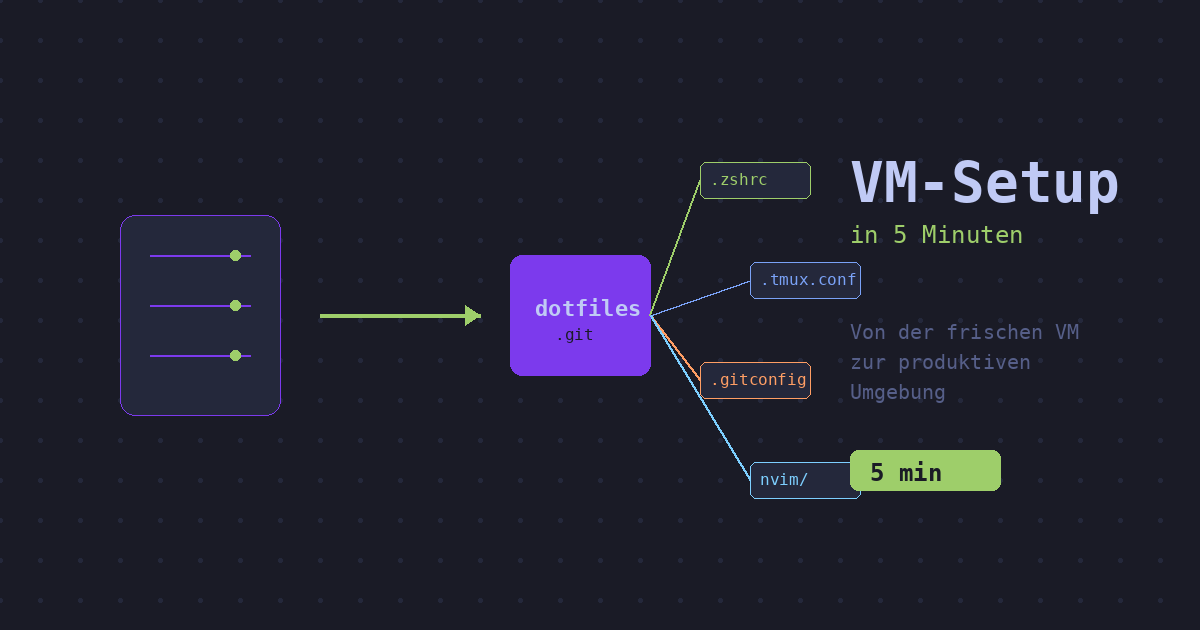
Eine neue VM einrichten war früher zeitaufwändig: ZSH installieren, Plugins klonen, Configs anpassen… Mit Dotfiles geht das in unter 5 Minuten. Diese Anleitung zeigt den schnellsten Weg zur produktiven Arbeitsumgebung.
 Von der frischen VM zur produktiven Umgebung in wenigen Schritten
Vorher vs. Nachher
Der alte Weg (20+ Minuten)
%%{init: {'theme': 'dark'}}%%
flowchart LR
    A[Neue VM] --> B[ZSH installieren]
    B --> C[Oh-My-Zsh installieren]
    C --> D[Plugins klonen]
    D --> E[Theme installieren]
    E --> F[.zshrc anpassen]
    F --> G[tmux installieren]
    G --> H[.tmux.conf erstellen]
    H --> I[Fertig?]

    style A fill:#f7768e,stroke:#f7768e
    style I fill:#f7768e,stroke:#f7768e
Probleme:
- Viele manuelle Schritte
- Befehle nachschlagen/kopieren
- Configs von Grund auf erstellen
- Inkonsistenz zwischen VMs
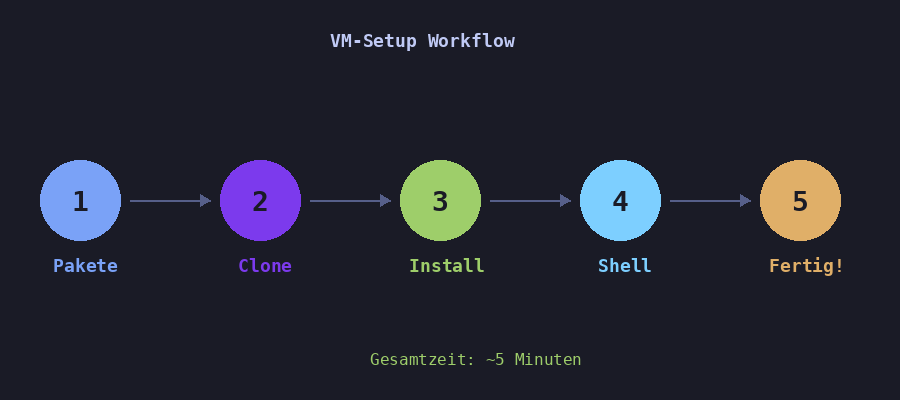
Der neue Weg (5 Minuten)
%%{init: {'theme': 'dark'}}%%
flowchart LR
    A[Neue VM] --> B[Basis-Pakete]
    B --> C[Dotfiles klonen]
    C --> D[Install-Script]
    D --> E[Fertig!]

    style A fill:#9ece6a,stroke:#9ece6a
    style E fill:#9ece6a,stroke:#9ece6a
Vorteile:
- Automatisiert & reproduzierbar
- Identische Umgebung überall
- Bewährte Konfiguration
- Versioniert & dokumentiert
Voraussetzungen
Eine frische VM mit:
- Debian 12 / Ubuntu 22.04+ (oder kompatibel)
- Sudo-Rechte
- Internetzugang
- Git-Zugang zum Dotfiles-Repository
Schritt 1: Basis-Pakete installieren
Zuerst die grundlegenden Pakete installieren:
1
2
3
4
5
6
7
8
9
10
sudo apt update && sudo apt install -y \
    zsh \
    git \
    curl \
    tmux \
    fzf \
    eza \
    bat \
    neovim \
    zoxide
Paket-Übersicht
| Paket | Funktion |
|---|---|
zsh |
Moderne Shell |
git |
Versionskontrolle & Dotfiles-Clone |
curl |
Downloads (für Zinit) |
tmux |
Terminal-Multiplexer |
fzf |
Fuzzy Finder |
eza |
Moderner ls-Ersatz |
bat |
Moderner cat-Ersatz |
neovim |
Editor |
zoxide |
Smartes cd |
Falls
ezanicht verfügbar ist (ältere Distros), kann es weggelassen werden. Die Aliases in der zshrc prüfen dann auf Verfügbarkeit.
Schritt 2: Dotfiles klonen
1
2
3
4
5
# HTTPS (mit PAT)
git clone https://gitlab.example.com/homelab/dotfiles.git ~/dotfiles

# Oder SSH (falls Key hinterlegt)
git clone [email protected]:homelab/dotfiles.git ~/dotfiles
Git-Credentials einrichten (für HTTPS)
1
2
3
4
5
# Credential-Helper aktivieren
git config --global credential.helper store

# Beim ersten Pull/Push wird nach Credentials gefragt
# Format: Username + Personal Access Token (PAT)
Schritt 3: Install-Script ausführen
1
2
3
cd ~/dotfiles
chmod +x install.sh
./install.sh
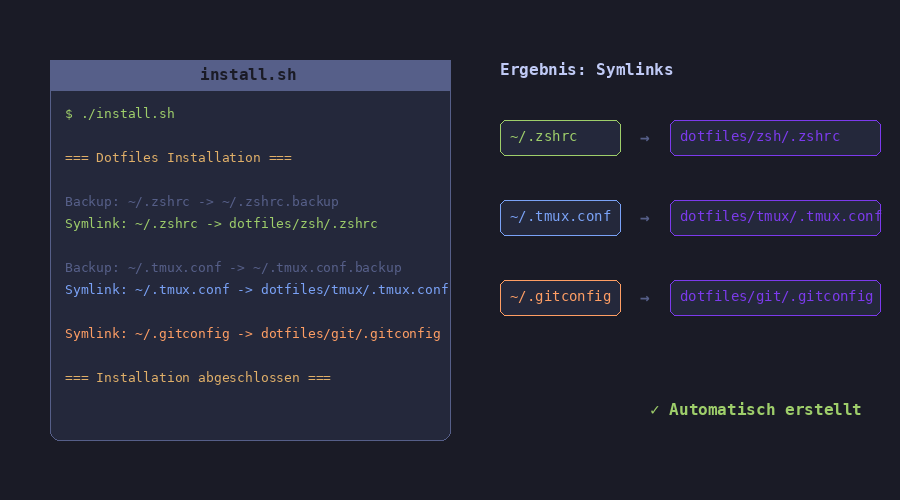 Das Install-Script erstellt alle Symlinks automatisch
Was passiert im Install-Script?
1
2
3
4
5
6
7
8
9
10
11
12
13
14
15
16
17
18
19
20
21
22
23
24
25
26
27
28
29
30
#!/bin/bash
# ~/dotfiles/install.sh

DOTFILES_DIR="$HOME/dotfiles"

create_symlink() {
    local source="$1"
    local target="$2"

    if [ -f "$target" ] && [ ! -L "$target" ]; then
        echo "Backup: $target -> ${target}.backup"
        mv "$target" "${target}.backup"
    fi

    ln -sf "$source" "$target"
    echo "Symlink: $target -> $source"
}

echo "=== Dotfiles Installation ==="

# ZSH
create_symlink "$DOTFILES_DIR/zsh/.zshrc" "$HOME/.zshrc"

# tmux
create_symlink "$DOTFILES_DIR/tmux/.tmux.conf" "$HOME/.tmux.conf"

# Git (optional)
create_symlink "$DOTFILES_DIR/git/.gitconfig" "$HOME/.gitconfig"

echo "=== Installation abgeschlossen ==="
Aktionen:
- Existierende Configs werden gesichert (
.backup) - Symlinks zu den Dotfiles werden erstellt
- Fertig - keine manuellen Anpassungen nötig
Schritt 4: ZSH als Standard-Shell
1
2
3
4
5
# ZSH als Login-Shell setzen
chsh -s $(which zsh)

# Neue Shell starten
zsh
Erster Start: Zinit & Plugins
Beim ersten Start von ZSH passiert automatisch:
- Zinit wird installiert (Plugin-Manager)
- Plugins werden geladen:
- zsh-completions
- zsh-autosuggestions
- zsh-history-substring-search
- fast-syntax-highlighting
- fzf-tab
- Powerlevel10k-Wizard startet
%%{init: {'theme': 'dark'}}%%
sequenceDiagram
    participant U as User
    participant Z as ZSH
    participant I as Zinit
    participant P as Plugins

    U->>Z: zsh starten
    Z->>I: Zinit nicht gefunden
    I->>I: Auto-Installation
    I->>P: Plugins laden
    P->>U: Powerlevel10k Wizard
    U->>P: Konfiguration wählen
    P->>U: Fertig!
Schritt 5: Powerlevel10k konfigurieren
Der Konfigurationsassistent fragt nach Präferenzen:
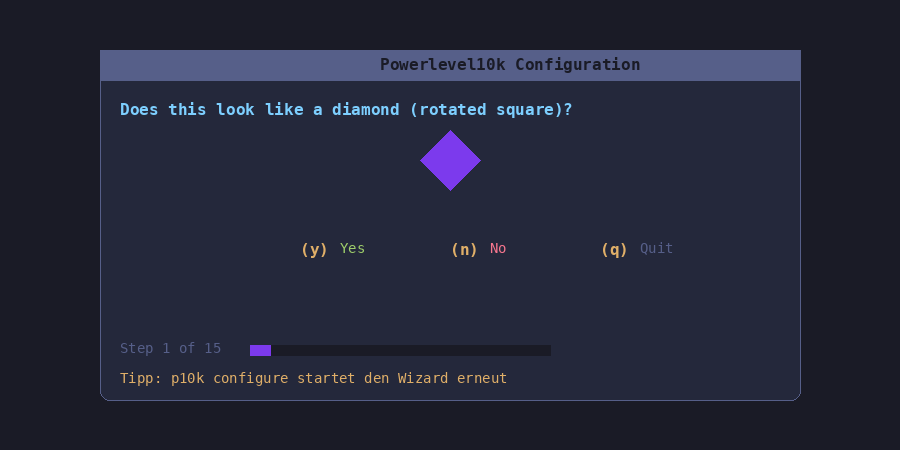 Der Powerlevel10k-Wizard für die Prompt-Konfiguration
Empfohlene Einstellungen:
- Prompt Style: Rainbow oder Lean
- Character Set: Unicode
- Show Time: 24-hour format
- Prompt Height: Two lines
- Prompt Spacing: Sparse
Die Konfiguration wird in
~/.p10k.zshgespeichert. Du kannst den Wizard jederzeit mitp10k configureneu starten.
Schritt 6: tmux testen
1
2
3
4
5
# Neue tmux-Session starten
tmux new -s dev

# Config testen: Prefix ist Ctrl+a
# Ctrl+a, dann r = Config neu laden
tmux-Features aus den Dotfiles
| Feature | Tastenkombination |
|---|---|
| Prefix | Ctrl + a |
| Vertikaler Split | Prefix, | |
| Horizontaler Split | Prefix, - |
| Pane-Navigation | Prefix, h/j/k/l |
| Config reload | Prefix, r |
Komplett-Script: One-Liner
Für maximale Geschwindigkeit - alles in einem Befehl:
1
2
3
4
sudo apt update && sudo apt install -y zsh git curl tmux fzf eza bat neovim zoxide && \
git clone https://gitlab.example.com/homelab/dotfiles.git ~/dotfiles && \
cd ~/dotfiles && chmod +x install.sh && ./install.sh && \
chsh -s $(which zsh) && zsh
Achtung: Passe die Repository-URL an dein GitLab an!
Troubleshooting
Problem: eza/bat nicht gefunden
Bei älteren Distributionen:
1
2
3
4
5
6
7
8
# eza manuell installieren
wget -qO- https://raw.githubusercontent.com/eza-community/eza/main/deb.asc | sudo gpg --dearmor -o /etc/apt/keyrings/gierens.gpg
echo "deb [signed-by=/etc/apt/keyrings/gierens.gpg] http://deb.gierens.de stable main" | sudo tee /etc/apt/sources.list.d/gierens.list
sudo apt update && sudo apt install -y eza

# bat ist oft als batcat verfügbar
sudo apt install -y bat
ln -s /usr/bin/batcat ~/.local/bin/bat
Problem: Zinit-Installation schlägt fehl
1
2
3
# Manuell installieren
mkdir -p ~/.local/share/zinit
git clone https://github.com/zdharma-continuum/zinit.git ~/.local/share/zinit/zinit.git
Problem: Powerlevel10k-Fonts fehlen
Powerlevel10k benötigt Nerd Fonts für die korrekte Darstellung von Icons und Symbolen. Die Fonts müssen auf dem lokalen System installiert werden (nicht auf der VM), da das Terminal die Schriftart rendert.
Empfohlene Fonts
| Font | Beschreibung | Download |
|---|---|---|
| MesloLGS NF | Offiziell für Powerlevel10k empfohlen | GitHub |
| FiraCode Nerd Font | Beliebt für Programmierung, mit Ligaturen | Nerd Fonts |
Installation: MesloLGS NF (empfohlen)
Linux:
1
2
3
4
5
6
7
8
9
10
11
12
# Font-Verzeichnis erstellen
mkdir -p ~/.local/share/fonts

# MesloLGS NF herunterladen
cd ~/.local/share/fonts
curl -fLO https://github.com/romkatv/powerlevel10k-media/raw/master/MesloLGS%20NF%20Regular.ttf
curl -fLO https://github.com/romkatv/powerlevel10k-media/raw/master/MesloLGS%20NF%20Bold.ttf
curl -fLO https://github.com/romkatv/powerlevel10k-media/raw/master/MesloLGS%20NF%20Italic.ttf
curl -fLO https://github.com/romkatv/powerlevel10k-media/raw/master/MesloLGS%20NF%20Bold%20Italic.ttf

# Font-Cache aktualisieren
fc-cache -fv
Windows (PowerShell als Admin):
1
2
3
4
5
# Font-Ordner öffnen
Invoke-Item $env:LOCALAPPDATA\Microsoft\Windows\Fonts

# Fonts herunterladen und per Drag & Drop installieren
# https://github.com/romkatv/powerlevel10k#fonts
macOS:
1
2
3
# Mit Homebrew
brew tap homebrew/cask-fonts
brew install --cask font-meslo-lg-nerd-font
Installation: FiraCode Nerd Font
Linux:
1
2
3
4
5
6
7
8
9
mkdir -p ~/.local/share/fonts
cd ~/.local/share/fonts

# FiraCode Nerd Font herunterladen
curl -fLO https://github.com/ryanoasis/nerd-fonts/releases/latest/download/FiraCode.zip
unzip FiraCode.zip -d FiraCode
rm FiraCode.zip

fc-cache -fv
Windows (PowerShell):
1
2
3
4
5
# Scoop (empfohlen)
scoop bucket add nerd-fonts
scoop install FiraCode-NF

# Oder manuell von https://www.nerdfonts.com/font-downloads
macOS:
1
2
brew tap homebrew/cask-fonts
brew install --cask font-fira-code-nerd-font
Terminal konfigurieren
Nach der Installation den Font im Terminal einstellen:
| Terminal | Einstellung |
|---|---|
| Windows Terminal | Settings → Profile → Appearance → Font face: MesloLGS NF |
| GNOME Terminal | Preferences → Profile → Custom font: MesloLGS NF |
| iTerm2 | Preferences → Profiles → Text → Font: MesloLGS NF |
| Alacritty | font.normal.family: "MesloLGS NF" in alacritty.toml |
| VS Code Terminal | "terminal.integrated.fontFamily": "MesloLGS NF" |
Nach der Font-Installation das Terminal neu starten und
p10k configureausführen!
Problem: Git-Zugriff verweigert
1
2
3
4
5
6
7
# PAT in Credentials speichern
git config --global credential.helper store

# Erster Zugriff - Credentials eingeben
git pull
# Username: dein-username
# Password: dein-personal-access-token
Updates synchronisieren
Nach der Ersteinrichtung - Dotfiles aktuell halten:
1
2
3
4
5
6
7
8
9
cd ~/dotfiles
git pull

# Bei Shell-Änderungen
source ~/.zshrc

# Bei tmux-Änderungen
tmux source-file ~/.tmux.conf
# Oder in tmux: Prefix + r
Cheat Sheet
Ersteinrichtung
| Schritt | Befehl |
|---|---|
| Pakete installieren | sudo apt install zsh git curl tmux fzf eza bat neovim zoxide |
| Dotfiles klonen | git clone URL ~/dotfiles |
| Install-Script | cd ~/dotfiles && ./install.sh |
| Shell wechseln | chsh -s $(which zsh) |
| ZSH starten | zsh |
Tägliche Nutzung
| Aktion | Befehl |
|---|---|
| Dotfiles updaten | cd ~/dotfiles && git pull |
| Shell neu laden | source ~/.zshrc |
| tmux neu laden | Prefix, r |
| p10k neu konfigurieren | p10k configure |
Fazit
Mit Dotfiles wird das VM-Setup von einer zeitraubenden Aufgabe zu einem 5-Minuten-Job:
| Aspekt | Manuell | Mit Dotfiles |
|---|---|---|
| Zeit | 20-30 Min | 5 Min |
| Fehleranfällig | Ja | Nein |
| Reproduzierbar | Nein | Ja |
| Konsistent | Nein | Ja |
Der Workflow:
- Basis-Pakete installieren
- Dotfiles klonen
- Install-Script ausführen
- Shell wechseln
- Fertig!
Investiere einmal Zeit in gute Dotfiles - spare bei jeder neuen VM!